Friday, August 1, 2014

Vacation and Relaxation

Hi Hive! I am so excited to get back to regular postings, but until I get my pro photos to start my recaps let's talk about something else. Honeymoons!

Being on the other side now (still amazing) I totally understand the need for one and why people go right after the wedding. The wedding itself is stressful and it's a great way to relax and unwind, which I totally understand now. Besides, who wouldn't want to spend a whole bunch of time with your new spouse smooching and loving life? I get it I really do. However, we joined the ranks of many bees before us when we decided to delay our honeymoon. Shocker, I know (ok maybe not). You will understand after this post, I promise!

 Mr. Farmer and I decided pretty early where we were going to head for our honeymoon, Bora Bora. There is no place like it in the world and it was a pretty easy decision for us to make. It was the one place we both wanted to go and it was the only place either of us considered going. We enjoy traveling and wanted to make sure our honeymoon was a trip of a lifetime and Bora Bora accomplishes that for us.
How can you say no to this, over water bungalows:

Photo via Hilton

I die, this is amazing! That is, until we started looking at travel times and flight times. Mr. Farmer has serious knee problems (surgery is on the horizon) and I have serious problems with my back/knees, so being in a plane for that long was a big no-no for our health (being 6'0 on a plane can be challenging at best). Doctors were consulted and the resounding answer was "No, not advised at this time". Bummer! Another deciding factor was that we didn't want to be quite so far away from the children, so with that we kissed our dream honeymoon good-bye and tried to find something a little closer to home.

To us, we knew that a beach was where we wanted to go. We went to Cozumel this past January on what we called our "pre-moon" so we knew without a doubt that Mexico was out for us. Fun fact time - the resort thought we were on our honeymoon and every time we tried to tell them we weren't married yet they thought we were joking.   

The Barns living it up in Cozumel with BM K/husband M and GM E/wife J:

Photos personal

I left the planning up to Mr. Farmer and he came to me to get the final approval. I gave him a few requirements and he was able to arrange the whole thing. So where are the Barns headed on their honeymoon?

Sandals Regency La Toc Saint Lucia!


I cannot even begin to describe how excited we are to go here. Now the other big mystery, when are we going on said honeymoon? Winters in Minnesota are pretty rough; it's frigidly cold and the wind makes it pretty unbearable. Mr. Farmer and I were both born in the month of January and what better way to celebrate our birthdays and beat the winter blues than to head somewhere warm and tropical. So the Barns will be holding off for 6 months and taking our luxurious honeymoon this coming January. Plus I needed to rack up some vacation time at my new job so it worked out perfectly for us to hold off.

Let's check out what we have in store for us in January. We have elected to go with the Sunset Bluff Oceanfront Two Story One Bedroom Butler Villa Suite with Private Pool (what a mouth full)!


Oh yes, you read that correctly - a private pool and a private butler! We wanted to make this a trip of a lifetime so in addition to the killer suite we made sure to purchase first class airline tickets. If we are going to do a first class honeymoon we might as well go all out right?! We also decided due to our medical issues the extra room first class provides was invaluable. We don't want to spend our honeymoon in physical pain so it was a very easy decision for us. 

The suite we chose also provides another amenity that was pretty invaluable to us. It's a good 90 minutes from the airport to the resort and with this suite comes a private car service to transport you from the airport to the resort. Knowing that we won't have to travel in a crowded bus going through the twists and turns it takes to arrive at our final destination is peace of mind for both of us (and our stomachs). 

Speaking of stomachs, yeah I just did that, I cannot wait to try all nine (yes nine!) of the restaurants on the premises. With the butler service we also have the option of having breakfast/lunch/dinner served to us in our room if we decide we don't want to venture out of the room, or as I prefer, put on real clothes. We have a choice of just about every cuisine we could choose from: French, Italian, Mediterranean, British, Seafood, and Asian Inspired. We even have a pizza place and a sushi restaurant! I have already made arrangements for a gym membership after this trip. I may or may not gain about 20 lbs enjoying all the amazing food!

Now, if we decide that we have explored enough of our resort we can venture to the other two Sandals resorts on St. Lucia. As part of the Sandals package we can take a trip to Sandals Grande Saint Lucia or Sandals Halcyon Beach to experience their amenities or restaurants. 

Needless to say we are looking forward to this trip! So now I turn to the wonderful Hive and ask, has anyone been to Saint Lucia? What are your recommendations? 

All photos via Sandals Regency La Toc unless otherwise noted

Friday, July 18, 2014

Becoming a Mrs.

Well the time is here my lovelies. I am sitting in my hotel room while my handsome groom is off spending some much needed time entertaining our guests. I am exhausted but totally excited all at the same time. The last 10 months have been a total whirlwind of emotions. Mr. Farmer and I have been planning this elaborate event for what seems like forever and now it's here. 

I can honestly say that this has been the time of my life. I have never been happier than I have been these last 2 days. Despite a few downfalls (death in the family, hotel mix-ups, rehearsal dinner snafus) nothing could bring me down from this amazing high that I have been on. I am so incredibly ready to marry the love of my life tomorrow in a front of all our family and friends. We are so blessed by all the people who have made the journey to Eau Claire to celebrate with us, and for that I am beyond grateful. 

To all the amazing readers and fellow Bees, I cannot thank you enough for all the encouraging words you have provided me throughout my entire journey, whether it be good or bad. Whenever I needed advice or support you wonderful Bees were there to lend an ear and offer advice. Specifically I want to thank Miss. Milk Cow for allowing me to blow up her mailbox with insane freak out moments. She was always there to give me a little advice and as she is doing the same thing as I am doing today, I cannot help but think about her and thank her for offering some insightful advice. 

One of the best things about this amazing experience is getting to share it with my step children. Watching them link arms as they walked down the aisle during our rehearsal, I couldn't help but smile to myself. There are just no words - none that could possibly express how much their presence here means to me. I am so lucky to be their stepmother, they are some amazing children, and hearing them tell me how much they love me and how happy they are that I am their step mom fills my heart with an overcoming sense of joy. 

Through this entire thing Mr. Farmer has stood by my side and supported me through every possible thing I could ask of him. When I was struggling with venues, he was there to lend a supportive hug. When I had problems with family, he was there to pick me up and talk me down. When I was going crazy with the details that I missed he was always my rock. I cannot thank him enough for the love and support he has given me throughout this entire journey. Mr. Farmer I love you so much and as I spend my final night alone, I cannot wait to wake up tomorrow with your name on my lips and love in my heart. I love with until the end of time and back!

Signing off for the last time as Miss. Barn! Thank you for following me on this crazy journey! I will see you fabulous folks on the other side, but until then I will leave you with this little sneak peak! WI pride baby...

photo personal

Love to you all! For the last time - Miss Barn


Friday, July 11, 2014

Suspended in Style

We are in the final phase of wedding planning - freak out phase! Ok, ok, I am just kidding (ok not really) but in all reality we are getting so close to the big day and the closer we get, the more excited I become. For the longest time I would tell Mr. Farmer that I just couldn't believe that I get to marry the love of my life and that it is only ______ months/weeks and now days away. It just didn't feel real yet, but now that we are in wedding month and the countdown is in the single digits I assure you, it feels real now! I am scrambling around trying to make sure we have everything together before we leave for the wedding.  

I am beyond excited to marry Mr. Farmer but until I do there are a few more things I wanted to share with you lovelies. Back when we were brain storming our menswear selections, I came up with an idea that I just omg.had.to.have. Since our guys are only wearing vests and those vests will be coming off shortly after the ceremony (because let's face it, they hardly ever keep those damned things on) I decided to have a little fun.

It all stemmed from one photo:

Maxwell Monty Photography/Hugo Boss menswear via Projectwedding

I love this photo. Not only because they are wearing Hugo Boss but I was really drawn to their suspenders. Huh?! Suspenders? Oh hells yes. It was an element that I was drawn too and I knew that once those vests get taken off after the ceremony they will be left with their tie (which most likely will be taken off too) and their suspenders. I still wanted them to look like a bridal party member and not just a guest at our wedding (not that anyone would confuse them). It was just one of my things so back off. You know, one of the things that you just omg.have.to.have. Every bride has a few of those things and these were mine, so we are having:

Bespoke Suspenders!

I presented the idea to Mr. Farmer who was totally in love with the idea. Why? Because his friends are total goofballs and it just fits their personalities and style to do something a little off the beaten path. Once all the guys found out what we were doing everyone was incredibly excited about rocking some bespoke gear. I enlisted the help of Irene from finehandmadeclothing on Etsy and well let's just say she is fabulous! I made sure to give her plenty of time and in 2 months** I had my suspenders sent to us in a nicely wrapped package:

photo personal

White for Mr. Farmer, hot pink for BM N, hot pink chevron for JBM R, black for our ring bearer, and gray for the rest of our guys.

I gave Irene free reign with the patterns and she knocked it out of the park! So fun story time. When Junior Best Man R found out that he was wearing hot pink he immediately told me, "Well if I have to wear pink, than I want a breast cancer awareness pin on my suspenders because real men who wear pink support breast cancer and so do I." I almost died of shock, - he is only 8! After I picked my jaw up off the floor I immediately obliged and got him a pin for his suspenders. JBM R is a huge sports fan (seriously he will blow you away with stats it's incredible) so I think his breast cancer support stems from the NFL and their pink sports apparel they wear during the month of October. Either way it was a great request and I couldn't be prouder!

In addition to the suspenders Mr. Farmer has decided to mix up the traditional outfit even more and has requested that his gents all wear mismatched socks. When I told MOH K about it she laughed and loved the idea. Why? Because apparently mismatched socks are a thing and "Miss. Barn how the heck do you not know this?!" Seriously K and R make me feel old sometimes, but anyways getting back to the point. Socks. Mismatched. We are doing it.

photo personal

I found a pack of 12 on Amazon here and since the price couldn't be beat, I snatched them up right away. Mr. Farmer has such a fun personality and all of his friends do too, so this is just a small way to bring their shenanigans to the wedding, in an appropriate way. I giggled when I received the package (because I still giggle, sorry not sorry) but I think our guys will be able to rock some fun socks and suspenders with big smiles. Everyone seems pretty excited about it and there have already been fights over who gets which socks.

photo personal

Taking something as simple as a rented suit and making it your own was important to not only Mr. Farmer but me as well. I wanted Mr. Farmer's personality to shine through, despite the fact he will be wearing something many people before him have worn. I am wearing a beautiful dress with all my lovely accessories, why not make sure he has elements he is just as in love with?

We are slowly wrapping things up and getting stuff ready for the wedding. Oh who am I kidding, we are running around frantically trying to remember all of the stuff we have to pack and get ready. I am slowly freaking out more and more every day we get closer and our poor house is a maze of shipping boxes with even more to come. At least our wardrobe is all ready, and for that I can be grateful!

What aspects of your attire were your favorites?

Thursday, June 26, 2014

Great Balls of...Paper?

Ok let's talk about something pretty today!

When the time came to think about aisle decor I was pretty blase about the whole thing.  I mean it's pretty and all but who really notices anyways, you know what I mean? So when Collette, our wedding coordinator, asked me what my plan was, I was at a total loss (seems to be my trend). I had pinned some inspiration quite some time ago, back when Mr. Farmer and I first got engaged (and when I was still using Pinterest) but I haven't even thought about it since then. 

The reason I haven't given it much thought? Because our aisle looks like this:

photo by The Florian Gardens via Facebook

It's a nice slab of cement. So the traditional aisle runner that I wanted to do was out. Cement and aisle runners do not get along very well. The wind gets a hold of it and creates ripples and creates a tripping hazard. I don't want Mr. Farmer to whip out his EMT training on our wedding day because someone fell. I would feel awful if someone hurt themselves at our wedding. No bueno. I would have loved to have one but logistics canned that idea and let's be real here, I would more than likely be the one tripping.

  My other fabulous dumb idea was this:

photo by Vienna Ramnauth

Isn't it funny when you look back at things you thought were interesting, only to look at them now and think, WTF MISS. BARN ARE YOU ON CRACK!?

This idea is pretty in theory but I would be way too scared of someone knocking it over and staining my dress or someone stepping on broken glass. Just looking at this now gives me anxiety at all the things that could potentially go wrong for an accident prone bride such as myself. *shudder*

Thankfully, I have a pretty awesome wedding coordinator who suggested hanging something from the shepherd's hooks that I could rent from them. Hey, I like the sound of that. Mama Barn had an idea and we went with it (to be fair I had pinned this project a while ago so it was a joint effort).

Photo via Pizzazzerie.com

I figured these would be the perfect thing to line our aisle with and would be fairly inexpensive to construct.

You need:

Paper of your choice
Hydrangea Punch

Pins

Styrofoam Balls
4' Styrofoam Balls - Photo via Ebay 

Ribbon
5/8'' navy ribbon photo via The Tulle Shop

These were pretty simple to make. All you do is punch and pin. Punch and pin. We used a slightly shimmery white paper and it looks pretty awesome in real life. There were some things that made the process a lot easier though. 

The first tip: It was faster if you punched a whole sheet of paper first


Mama Barn decided at the last minute to get some sequin to add to them and it really added a nice element to the flower. Everyone who has seen them loves the little detail. 


Once all the flower petals were punched it was pretty easy. Stick your sequin, pierce your flower and then fluff.


We decided to do two colors to add some contrast up the aisle, and to help keep costs down we used regular pins that Mama Barn already had in her sewing collection (not that it saved mega bucks but makes me feel better). The original tutorial suggests using the pearl topped pins but they were more expensive and they didn't come in a large enough quantity so you could spend some serious dough on the pins. I suggest if you are going to use regular pins make sure that the head is big enough to keep the sequin from falling off, if you decide to add the sequin.

We also flexed the petals a bit before we stuck them into the ball, especially because we only used one punch per pin, whereas the inspiration used two. The longest part of the assembly process was stabbing the needle through the sequin hole and then pushing it through the paper. 

This was the easy part!


We would push the flowers into the ball and when it was finished we would go over it again to see if there were any spots that needed to be filled in or pins that needed to be moved. The paper we used was just a sheet of card stock that we got at the local Michael's. We created 12 balls and it took the three of us (Mama Barn, MOH Fluff, and me) close to about 6 hours. I wanted to see how many pins each 4" ball would take and it was roughly 150 pins for each ball (you're welcome for that). Which means we went through approximately 1800 pins and punches!!


For the pink pomanders here we wrapped it with a fuchsia tissue paper before pinning the flowers down so that the "space" between each pin wouldn't be as noticeable. At the end we had extra flowers so we combined the colors to create 2 pomanders that will be used for the first rows at the venue. We figured this would be a good way to differentiate our VIPs. 


This wasn't a very expensive project as the most expensive part was the Styrofoam balls. I totaled my costs and I came to to $50.55. Mama Barn bought about $12 worth of supplies so the total was $62.55. Thankfully the weekend we worked on this project JoAnn's was having a great sale so we used coupons for the three trips we had to make (it always sucks when you run out of something). 

My final tip: Make sure you buy enough the first time around. It's easier to return stuff than have to keep sending your brother to the craft store with a coupon and picture (way to go bro, always willing to lend a hand).

We also decided to make another kind using a different kind of paper flower. I ordered some carnations from eFavormart for pretty cheap ($49.16) after seeing some people on the boards of WB talk about them. I ordered these before Mama Barn came up with her idea to use the punched flower pomanders, however they did not go to waste. We have decided to use these as decoration throughout the venue.


I ordered white and fuchsia and made 1 solid color and 2 mixed colors. The mixed colors will be given to our flower girls to carry.


As soon as our flower girl saw this she was so excited to carry it. 

All photos personal unless noted

So there ya have it, an alternative to an aisle runner. What did you decide to line your aisle with or did you forego decor all together? 

Tuesday, June 24, 2014

Barns on the Loose

Two weekends ago was my bachlorette party and Mr. Farmer's bachelor party. Since all of our close friends are standing up (and quite a few haven't met each other) we decided to have a joint party instead of separate ones. It worked out better for us and our friends to do it this way, and hey it's my party I can do it however I want. 

The Friday before the big day we packed Mr. Farmer, Best Man N, Bridesmaid K (also N's girlfriend) and me into my car for a 6 hour road trip to Wausau, Wisconsin, my hometown. We decided to split the trip up and spent Friday night in the Cities (Minneapolis/St. Paul). While I was busy stitching in the front seat, Mr. Farmer was busy snapping ridiculous selfies (at a stop light of course). 

K is such a good sport

In the morning we split ways and the boys headed towards Wausau while K and I headed towards Eau Claire. I had my "re-do" hair and make-up trial, which I will share much later I promise. After Jez successfully flipped my look from bridal to bachlorette K and I hit the road to join the others. Although before pulling into the hotel we did make a mad dash to Ulta, priorities people! 

We met up with the boys and headed to the hotel to begin getting ready. Some friends showed up early while we were getting ready but they were awesome and hung out until we were all finished. Clearly our hotel room was the place to be. We ate some chow where I was able to spend some time with Mama and Papa Barn as well as my bro. I don't get to see them much and Papa Barn works weekends so it's pretty rare that I get to see my daddy for more than a few minutes when I am in town, so it was nice to chat with him, especially the weekend of Father's Day!

So I am just going to go ahead and say our party is probably not at all unique to anyone and clearly not very awe inspiring but it was a blast and everyone had a good time, so I will spare you the play by play and just give you the highlights should you be curious. If you're not skip ahead no hard feelings.

MOH Fluff spearheaded a party bus rental and that's what we did (she did a fabulous job organizing everything, shout out to Fluff). So, bar hoping. Mr. Farmer and I aren't huge party people/bar flys but we certainly had one heck of a good time and I know our bridal party and friends did!

There was dancing:

N - BM K's husband M - Miss. Barn and BM K

Many photos with my special ladies:

BM K, BM KA, BM S, me, Fluff - Fluff and Me - Me and Fluff - Me and my Aunt M

Scavenger hunt shenanigans:

 Yours truly and BM K

Make a veil out of toilet paper? Check!

GM R

Enter the women's bathroom? Nailed it!

N

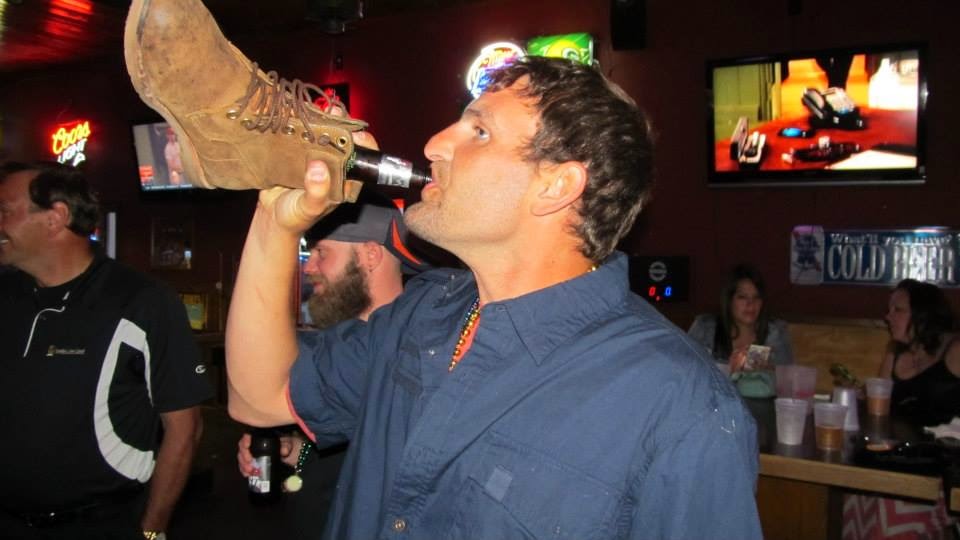
Drink a drink out of a boot? Done!

Yours truly 

Dance on a table? No problem!

Mama Barn and N

Have a member of the opposite sex give you a tattoo? Complete!

Mama Barn made a quick appearance as she dropped off my bro for the festivities and they nabbed her right away. Major Kudos to Bro Barn for making an appearance despite his huge social anxiety and social phobia (was a total trooper, I love him for coming out and about!). 


MOH Fluff came up with a 3 page document of tasks for each group, for a little battle of the sexes, boys versus girls. A photo had to accompany each task for it to be marked complete. The girls totally won for anyone who cares, girl power all the way! 

For those wondering I rocked a frock from Rent the Runway:


Kate Spade - Celebrate Good Times via RTR

Of course I cannot forget the amazing shoes I wore either. Mr. Farmer surprised me with these a few days before the party. Any man who can buy designer shoes (and ones that match) is a keeper in my book! It was a wonderful surprise and I am uber excited to find another occasion to rock these babies:


MOH Fluff gifted me some goodies, so I rocked the typical tiara, sash, and carried my "Suck for a Buck" bouquet with bachlorette pride. It was totally fun getting all dressed up, even if it was only to go out in little ol' Wausau, Wisconsin- it was still a good time and we owned it.
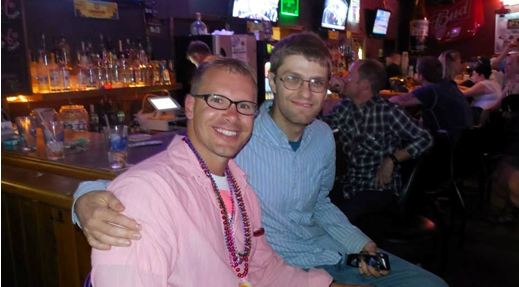
And of course the evening wouldn't be complete without a few photos of the Barns together:

All in all it was a fantastic evening with great people and we were incredibly blessed to have all of our friends come together and throw such a wonderful party for us.  It was also a great opportunity for our friends to get a chance to meet one another and for that everyone was grateful!

What did you do for your bachlorette/hen party?

**all photos personal**

Friday, June 20, 2014

Invitation Composition: Assembly

Our invitation suite was seriously a struggle for me but I couldn't be happier with how they turned out. Obviously they are my invites and I love them so if these aren't your style no hard feelings if you skip this one. As a reminder:


Let's just dive right in.

Our invitation suite was ordered from Rebecca from mycharmingprints on Etsy. She was incredible to work with and gave me 2 additional cards for no charge. She also changed the design to match the colors I requested, and oh yeah did I mention she did it all within 24 hours?! Honestly she is fabulous and I would use her again in a heartbeat. 

I printed our invitations from U-Printing because I had a coupon and heard good reviews. I would recommend signing up for email lists; they send you coupons or promotions and it's a great way to save some cash. I was slightly apprehensive since I don't know a danged thing about printing and whatever other nonsense they ask you about, but I was incredibly pleased with the outcome. 

The outer envelope was from Envelope Mall, in their Curious Metallics line, color Ionized.


 Now I printed these myself in our basement, where our printer is located. I laid them out to dry and then stacked them up until we were ready to use them. Do you see where I am going with this? Imagine my surprise when it came time to assemble our invites and some of the envelopes were already sealed!? I wasn't thinking about the fact that it was spring in Minnesota and very humid, especially in our basement. Stacking them like I did was a disaster waiting to happen. I spread them out upstairs and was able to salvage most of them but I did have to reprint some. So tip number one - make sure you have extra envelopes for mess ups!


Don't stack your envelopes for an extended period of time if you can avoid it. You don't want to have them seal themselves (there may have been cocktails involved after I realized my mistake - regroup and recharge and all that goodness). 

The inner envelope was another Envelope Mall purchase, the Euro Flap Stardream Metallic in Lapis Lazuli.


They are much darker in person. I wanted a dark navy and these did not disappoint; they had a nice shimmer to them too. I also used a wax seal with the same pattern as Mrs. Goat. I got the stamp and wax via a Weddingbee Classified ad way back in the beginning stages of our planning, knowing that I wanted to use it on something.

I followed the same instructions the lovely Mrs. Waterfall and many Bees before me suggested. Although instead of a plate we went with wax paper so we could get a bunch of them quickly and it worked really well. Sadly after making these my glue gun bit the dust (at least it waited until after I was done)!


We went with a stacked design because I wanted to keep everything fairly simple with just a few eye catching elements. Not to mention that throughout my research, I realized that I could run into a postage problem by having the pocket fold I originally thought about. I didn't want to have to spend more than I had to so this option worked best for us.


As you can see we added an envelope liner. I ordered silver wrapping paper as a way to save some cash and it worked out very nicely. Had it been the holiday season, or had I actually known what I was going to do earlier, I would have purchased the wrapping paper during the winter months to save even more money. For those looking to do an envelope liner, I would highly suggest using wrapping paper.

 I was a little apprehensive ordering it online, since the stock picture was not very detailed but I am very happy with it. For those of you wondering, we were able to get 30 liners for an A7 envelope out of 1 roll. Mama Barn figured out the best pattern to get the most out of each roll. I ordered 5 rolls and was able to get enough for 150 envelopes including some test templates. 

Breaking this down budget wise we did pretty well:

Outer envelope - Envelope Mall: $63.12
Inner envelopes Envelope Mall: $55.77
Silver wrapping paper - Paper Source: $61.57
Ribbon - Koyal Wholesale: $49.00
Forever Please Mini-Moo: $64.68 (250)
Invitation design - Etsy: $25 
Invitation Printing (3 different cards) - U Printing: $172.71
Wax & Stamp - $17.84
Postage - $216.05

Grand total: $725.74 for a total of 200 invites 

Total cost per invite: $3.63

This was still cheaper than anything I could order online, that I liked, and even though it wasn't a full DIY I am incredibly happy with the way they turned out and hearing how much our guests loved them only makes it better!

I owe a huge thank you to Mama Barn who actually assembled the bulk of our invitation suite. Since we live 6 hours apart (total bummer) she really wanted to do something to contribute and this was the perfect chance. Everything I ordered was shipped to her and she (and even my Bro) put together everything except the wax seal, the outer envelope, the stamp and sealing.

Did anyone else have any invitation headaches? Did you come in under budget with your invitations?

Wednesday, June 18, 2014

Invitation Composition: You're Invited

Now that my RSVP's are finally coming in (with the deadline nearing), I can safely share the full invitation suite with the Hive (finally I know). So with the awful designs and my frustration out of the way, I was ready to move forward with having a great invitation. Behold, the Barn wedding invitations.

You are formally invited......

Our outer envelope:


The inner envelope:


The view when you open the envelope:


Here is where we used our Forever Please love logo:


Our Invitation:


Our additional information card. 


Our R.S.V.P Card:


We put together an assembly line and it took Mr. Farmer and I about 3 evenings to finish all of the invites. Our setup may or may not have been the most organized process:


And here is all of the pieces separately (excuse our awful deck):

So there you have it! All of the Barn invitation parts and pieces. I have been receiving loads of feedback from my family and friends on how much they loved these. There is nothing better to a bride than hearing all of her hard work paid off! When guests message you to tell you that your invitation is beautiful among other compliments, it certainly brings a smile to your face.

 Up next I will break it all down for you.

What do you think? Did anyone else have quite the assembly line or lack there of?