Thursday, January 9, 2014

DIY Success!

As I am enjoying the frigid temperatures in the lovely Midwest, I figured I would take the time to share with you one of my first DIY projects. I finally finished up a project that I had started a few months ago. However, before we begin if you are one of my fabulous BMs then I suggest you "take a hike", "get lost", or simply just go get a mani. Whatever you do, go find some other reading material to occupy your time. I love you long time but this post is NOT for you!

I mentioned before that I am pretty crafty or at least think I am. It stems from my insanely crafty mother I do believe. Either way, I wanted to gift something to my bridesmaids that had a little meaning behind it rather than just throwing down the cash on something. What is more meaningful than a handmade craft!? I also have 7 bridesmaids and that can add up quickly! Wowza! So I found this amazing image on Weddingbee, seriously this site is like crack. Don't say I didn't warn you. 

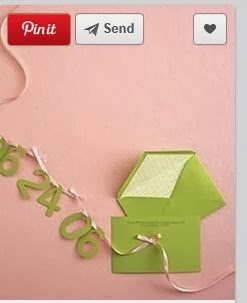
Anyways my inspiration picture:
Credit and her tutorial

Being the crafty woman that I am, I figured I could make something like that for my girls! So without further ado I give you the Borman Wedding Bracelets.
As you can see I made mine slightly different than Mrs. Rucksack's but still followed the same concept. 
Supplies:
Ribbon (I used 2 different sizes so the Navy would sit inside the Fuchsia)
Scissors
Beads
Sharpie or dark pen
Thread
Sewing Needle
Ruler
Lighter (optional)
 Step 1:  I cut the ribbon ends on an angle and used a lighter to singe the ends so the ribbon wouldn't fray. The ribbon I used was a satin ribbon from Wal-Mart. Nothing fancy here folks!
Step 2. Through trial and error I realized the spacing that looked best between each stitch was 1/2 inch. I found it easiest to take a Sharpie and make a little dot every 1/2 inch to keep it even and know where to make my stitches. The dots won't get seen, however I still made the marks on the "underside" of the ribbon. I left a good 3-4 inches before I started making the marks. 
Step 3. On the "top" side of the ribbon I made a knot, and then sewed an "x" so that my end wouldn't pull through the ribbon. I realized this mistake JUST as Mrs. Rucksack did and had to start over after one of my bracelets broke. I thought the knot would suffice but I was wrong, you need the "x". I chose to start on the top but you can start on the underside, however I started this way so I just continued this way. 

*Note: I used a much heavier thread. Mine was an upholstery thread whereas Mrs. Rucksack's was a standard thread. I don't think it matters much which kind you have. I just wanted mine to be heavier so I wouldn't risk it snapping. Don't want all my hard work going to waste!
Step 4. Weave your needle and thread through the ribbon checking after each stitch to keep your smaller ribbon centered. This is where the dots come in handy. I considered the pink side the "bottom" side and the navy side the "top".
Step 5. I went 3 stitches before I put a bead on. I figured it would give more ruffle and just to try something to make mine a little different than Mrs. Rucksack's. 
Step 6. Put bead on and pull. This is what it should look like after you put the bead on and tighten it up. Keep going until your satisfied with the length.
Tip:  I pulled it tight every few stitches so that it wouldn't be too loose. 
Step 7. Once I got done I went through and pulled it tight to help get any "looseness" out of the bracelet. You can see that mine was a little tighter then Mrs. Rucksacks. Mine is more structured where hers is slightly more relaxed. I realized afterwards that it started to make a "U" shape when you pull it tight. I also noticed through trial and error that if you do pull it tight like I did, that it does help to start your knot and "x" on the top side of the ribbon. It looks a little nicer when it's the tighter version. 
Step 8. Once I had it pulled very tight I put a knot on the top of the ribbon and sewed a little "x" through the final ruffle. I added an extra knot after I sewed the "x" because I was paranoid that it would pull out.  1 knot and the "x" would probably suffice but better safe then sorry. 

And there you have it lovelies!! 


What do you think? Have you used someone else's creation as inspiration for your own craft?

Saturday, January 4, 2014

The Special People

When it comes time to pick your wedding party, a lot of thought goes in to who do you select to stand up? C and I have a huge group of friends and were totally stuck when it came time to make a selection, (serious discussions were had). Most of our friends don't know each other and we each wanted people for different reasons.

  The 2 most important people in our wedding besides C and me, are C's children.

Miss. Kayli will be 12 years old when we get married.  She is going to be my Junior Maid of Honor and a total rock star!
 
Mr. Rysley will be 1 month shy of 9 when we get married. He will be C's Junior Best Man and this kid can tell a story unlike anyone I know.

C and I are incredibly excited to share this experience with them and excited for all the activities to come. We don't get to see them nearly as much as we should so all 4 of us are looking forward to the wedding so we can spend some quality time together. 


The easiest decision to make was our Matron of Honor and C's Best Man. They are our best friends and C and I couldn't image getting married without them. They are amazing people and have the biggest hearts. Furthermore they both are super supportive of our relationship.

My Matron of Honor, Bethany (MOH B) has been my best friend since 6th grade. I was the maid of honor in her wedding and it's only appropriate that she is the MOH in mine. I couldn't image getting married without her. Seriously folks she's my lifeline and probably the best MOH ever besides me of course! I know with her I will have absolutely NO problems the day of our wedding.

C's Best Man, Nick (BM N) has been his best friend since Nick was born. There is a story floating around that C dropped Nick on his head as a baby. Jury's still out on that one. He hates getting his picture taken so I will be having a chat with him on our wedding day to ensure that he smiles! He doesn't want to see my wrath!


The rest of the bridal party took us about 3 weeks to decide. We couldn't narrow it down so we are going to say "F it" and have a HUGE bridal party. We simply couldn't narrow it down so our motto became the more the merrier. 

Without further ado I give you the Borman Wedding Bridesmaids.

BM Tracy (BM T) is C's sister and I am super excited to have her as my sister in law! She is amazing and my source of humor every Wednesday when she sends me a "Happy Hump Day" email. Her lovely daughter FG Kourtney (FG K) is the one and only who picked out my dress.

BM Suzi (BM SQ) is one of my newest friends but a dear one. C and I actually helped her fiancé Greg plan his proposal and helped to stage it. It was an amazing thing to be a part of. I will be standing up in her wedding in 2015. Her fiancé is none other then our amazing DJ, Greg.

BM Sierra (BM S) is my cousin sorta. Her mom is my godmother, my mom's closest friend and first cousin. I was actually a flower girl in her mother's wedding and as one of my favorite cousins it's only appropriate that she be in my wedding!

BM Kayla (BM K) is one of C's best friends and one of my first when I moved to MN. Between BM K, C, BM N, and myself we form what we love to call the wolf pack. The 4 of us love to have a good time and find all kinds of fun interesting things to do on a boring Friday/Saturday night. She is also responsible for keeping track of BM N throughout the wedding, bless her soul. Someone's gotta!

BM Krysta (BM KR) is one of my dearest friends from WI. I was the MOH in her wedding so I certainly couldn't get married without her. She is over the moon excited that I am finally getting married. Her husband is another of my dearest friends and their son, Jordan is my godson. I love their whole family!

BM Jess is one of C's best friends. Her and C used to live together for a while. I quickly fell in love with her too when I met her and seriously her and I share a deep love for anything with fur an 4 legs. She is a total sweetheart and C "couldn't get married without her".

Personal Attendant Christina is one of my nearest and dearest friends from Colorado. She is INSANELY busy and always traveling somewhere. She will be planning her very own wedding very shortly, if she can find enough time in a day, and I am honored that I get to be a part of her wedding! 

Now for the remainder of the bridal party, C's groomsmen.

GM Ryan (GM R) is one of C's best friends from when he lived in Minneapolis. He is surly going to be the life of the party if he ever sits still long enough. Seriously this guy is so busy all the time it makes my head spin. Every time we see GM R it is a fun time and our wedding won't disappoint!

GM Cary (GM C) is another of C's best friends. He has 3 daughters, 1 of whom is in Kayli's grade. As a single dad major kudos to him for raising 3 girls. Wowza! I love standing near GM C because of how tall he is. He always makes me feel short and at 6'0 that's not an easy task. His girls are just as tall. Happy dance! I love tall girls!

GM Eric (GM E) is one of C's childhood best friends. Him and his wife are joining us for vacation in about 3 weeks. GM E is always up for anything and one of the most reliable people I have ever met. You need something and call GM E, he's there. He is such a good friend to C and I adore him just as much.

GM John (GM J) is another of C's best friends. They share a love for sports and Hooters. They have a standing tradition that when they see each other it is typically at Hooters.  Come the weekend C and GM J are always texting stats and sports information back and forth. You want to know a sports stat, this is your guy.

GM Greg (GM G) is another childhood best friend. GM G is part of a windmill company so he is always traveling and on the go. Him and C go on a yearly ice fishing trip with a few guys and each summer him and his wife join us for a delicious fish fry with the fish they caught on their trip. Yum.....

GM Zach(GM Z) is my brother. He is very excited to gain the brother he wishes I were. GM Z has already given the proverbial "brother" talk to C and of course is the protective brother he thinks he should be. In all honestly he loves  C and is super excited to see his little sister get married. I am super excited for him to be there.

Usher Ronnie and C used to live in the same city and him and C share a love for working out. Usher R runs Tae Kwon Do school that takes up quite a bit of his time. We are super "pumped" (get it!) that he said yes to being a part of our big day!


Usher Dustin is another childhood friend of C's. He is a first time daddy to a beautiful little girl who was just recently born and also going to be planning a wedding of his own very shortly. We are super lucky he has time to fit us into his crazy busy schedule but are grateful for him to be there.

We are very thankful to have such a wonderful wedding party who supports our relationship. All of them were super excited to be a part of our wedding and we are just as excited to be able to share it with them. We are a very blessed couple and we thank the heavens for the amazing people who are in our lives.

Did anyone else have a large wedding party? Did anyone else struggle to pick who should stand up?

Monday, December 30, 2013

Save the Dates, the Supplies

So last I left you I had agreed to show you the design for our save the date magnet. Now I am not saying that this will work for you or your budget but it worked for us and I am pretty excited about what we came up with. We have a large guest list and we wanted to be cost effective.


We tried to keep it fairly simple so that it wouldn't look too busy. I think it turned out well and I have received a lot of compliments on it so far. I was able to design this directly in the Build A Sign web application. It worked for us. Please note that if you do go this route the magnets are fairly thin. Something Mr. Farmer and I were totally fine with as they will most likely be thrown away but just to give you a fair warning.
Before I get into the assembly process with our save the date magnets and insert, I wanted to let you know the materials I used to create the end product. About 2 months ago I ordered some cardstock for various projects and to test it out for our invitations. (More on that later)
Again I was shocked at how expensive paper could be and honestly how difficult it was to find navy blue cardstock! I would find grey(gray?!?!? still help) and fuchsia no problems but navy was a whole other story. Thankfully MOH B sent me to Paper and More and I was able to find a nice shade of navy.
 They called it Nightshift

I wasn't too sure about it based on this picture but once it came in I was SUPER impressed. It was also very affordable. 100 sheets for $18.99. Clearly I wasn't going to use a full 8 1/2 x 11 so I knew that I could reasonably get quite a few out of this. I also wanted to incorporate the fuchsia color to add some dimension.

I ordered this paper off a different website because I used my Google ninja skills and found another awesome deal. I got this cardstock at Create for Less
 

I was able to get these in packs of 25 for $3.99 each. So for 4 it came to $15.96. I was able to get a free shipping discount on this product. YIPPEE!! Saving money folks, it's a great feeling! Although now looking back it seems a bit TOO pink. I am still undecided. Seems to be a running theme in my world. Anywho moving along......

So now I had these 2 colors. Both of these were a cardstock so I didn't want my save the date to get any heavier with the magnet and the insert so I used just plain old white copy paper to print the information out on. I typed up a pretty simple insert that I will share in my next post when we assemble them.

I knew that once I had purchased the card stock I would need something to cut it with. I got something very similar to this. I cannot find for the life of me the exact one I have, but this is pretty close:
 
Photo via Target - Fiskars
 
A paper trimmer! Seriously if you are doing any sort of DIY paper products you need to invest in one of these bad boys. I use this thing ALL the time. BEST CREATION EVER! Seriously genius, and it isn't super expensive. This runs about $10-$12. Get one. No joke.
 
The final product that was used is my life saver.
Elmer's Glue Adhesive Runner via Stuff 4 Crafts

This thing is seriously amazing. And of course you will use a lot so you have to get:
The replacement refill via Stuff 4 Crafts

This was a super easy way to make sure all of my layers were assembled perfectly. Just make sure that whatever brand you get you remember so you can get the refills. It has a nice adhesive so it stuck well, so well that I had to make sure I didn't get too carried away and get it on my table.

So that's what I used in assembling our Save the Dates. So far my total expense came to about $100 including the magnets. Not bad I thought.

Did anyone else have any special tools that helped during a DIY project? 

Save the Dates

While Mr. Farmer and I were waiting for our Engagement prints and release to be finished, we needed to decide what kind of save the date (I just can't do the acronym) we wanted to create. Since we had hotel issues we knew that we needed to get the information to our guests as soon as possible. We wanted to ensure that they had plenty of time to reserve a room at either hotels.

We figured we would accomplish this by just putting in an insert. Easy Peasy! Now for the actual hard part. There are so many great ideas out there today. One quick look at Pinterest will leave your head spinning. So many pretty ideas.

A calendar

Photo from Something Turquoise by Jen - Photo Credit Studio 11
 
Or how about this cute one?!


Photo via Martha Stewart

These are awfully cute though too!

Photo via Confetti Day Dreams, Copyright, Heather C. Johnson

You see there was just SOO many cool ideas for photos and things to do for our Save the Dates. I wanted to be creative however C wanted something that we didn't spend a large portion of our budget on, as people were "just going to throw it away". So after some consideration C and I decided the best option for us would be............

A MAGNET!!!
 
That way we could still be creative with the design but wouldn't have to spend a ton of time creating and assembling our creation. Now when I went in search of a good company for magnets I was shocked at how expensive some of these things can run.

VistaPrint was no doubt one of the most expensive ones.  I tried Zazzle. I really liked the options that VistaPrint had over Zazzle but it was still more then I was willing to pay. I designed a perfect magnet at VistaPrint and it was about $1.40 per magnet. Well I would need close to 170 magnets (yes you read that correctly) and that was going to add up quickly. We tried to find something for under $1 or right around that price.

Well I put my Google skills to the test and found a perfect site. Build A Sign was my solution. Here is where I let you in on the goods!

 You see I started thinking about it and a Save the Date magnet was really no different then a regular business card magnet so I ditched the "save the date" in my search. I got a whole new list of sites instead.

Check out the comparison. This is my search using "Save the Date Magnets"
 
Image via Screen Capture of Google - Save the Date Magnets

All of these sites charged a significant amount to design and print a magnet. So instead I tried "Business Card Magnet"

Screen Capture of Google - Business Card Magnet
 
 These companies on the other hand didn't charge an arm and a leg. You had to do a little extra design work but they worked just fine. I checked out quite a few of them before I decided. (It was a day of designing and wine, lots of wine)

I can't remember exactly where I found Build A Sign but I know it was through a Business Card Magnet search. I will tell you this ladies. They saved me a TON! I was able to design a magnet and get 250 shipped to me for $40.49. Yes you read that correctly. $.18 for each magnet!

When I entered the site I signed up for their mailing list and got an additional 10% discount. This was EXACTLY what I was looking for. I could of uploaded a design that I had already produced but I used their tools to design my own on their site. It wasn't nearly as fancy as VistaPrint but it certainly did the job. Stay tuned to see the finished product!
 
Did anyone else change up their Google search to yield different results? How did it work for you?

Friday, December 27, 2013

A Dress for my Maids

When it came time to think about bridesmaid dresses I wasn't too picky. Honestly looking back it was probably one of the easiest decisions that came about. (I say that now, although after writing this post I may reconsider that statement)
 As a reminder our colors are:

Screen shot via my Microsoft Word

With the wedding being outside, in the hottest month of the year, at the hottest time of the day I knew I that I didn't want anything too heavy. So satin and taffeta were out. I really like the look of chiffon. I know that chiffon is a very typical bridesmaid material but I think it's pretty flattering for everyone. With it being so flowy it matches my dress very well too. 

We (MOH B and BM K) started looking at short dresses to start to get some ideas.
After looking at a bunch of the dresses I really decided that I wanted long. I think it gives a more formal feel. You see our venue does have a slight dress code. They ask that you make smart choices and prefer cocktail type attire. (I am sure it's their way of saying jeans and a t-shirt is probably NOT going to cut it).

I didn't want to overpower my wedding with too much hot pink so we also decided that the dress color would be navy blue. Too much hot pink would be too "loud" and probably a little harsh. It also wasn't quite the look I wanted.There was also most certainly one other requirement that I insisted upon. Not strapless! There is nothing I hate more than watching a woman pull up her dress all night long. UGHGH!

OMG, it drives me crazy, seriously I would look like that if I had to watch my girls yank up their dresses all night long. A personal opinion, I think it looks tacky to be yanking at your dress all night long. I wasn't having any of that for my girls. So my requirements so far were this:

1. Long
2. Chiffon
3. NOT strapless
4. The right color navy blue
5. Preferably with a little bling as my dress had some

Now another requirement that I wanted was that it came in navy blue AND hot pink. I can hear you all now going "but Miss. Barn you just said you wanted navy dresses." There is a reason I wanted the hot pink. 3 words...............

MATRON OF HONOR

That's right! I wanted my MOH to wear a different color dress so that she would stand out as a person of honor as she rightfully deserves.

Once I had my criteria for the BM dress I took to the internet to see what I could come up with. Since MOH B was only just recently married herself she helped in the search. I immediately fell in love with everything Bill Levkoff had on his site. There were quite a few I liked. I knew that I wanted all my girls in the same dress. I think it just looks simple and classic and works perfectly for our wedding. This was a popular style that I kept coming back to:


I know you are looking at this dress going, umm but it's strapless. I decided that even if it was strapless that we would sew straps on. Just so long as it had some kind of strap to go with it, I was A-ok with that. I also realized that I was drawn to the sweetheart neckline, so we added that to the list as well.

1. Long
2. Chiffon
3. Must have straps
4. Comes in navy blue and hot pink
5. Has some bling
6. Not too expensive
7. Sweetheart neckline

Once I told my girls the criteria most of them were extremely relived and happy to hear that I would NOT be having strapless dresses at our wedding. Who knew! I figured most girls liked the strapless look, but then again they can be a pain to wear if not altered/fitted correctly.

After some research most of the girls liked this dress but it was actually much higher in price than I wanted my girls to spend on their dress. Once we looked at this dress in person, we decided it was ok but not our favorite.

Moving along. At some point, I can't remember which store it was but we pulled this dress:


I think it was BM K who pulled this dress and we had her try it on as she is the most, how shall I say, gifted, of us ladies and it was her biggest concern. She tried on the dress and LOVED IT! I looked at the price tag and loved it even more. The first place we looked at this dress had it listed for about $170 before tax.

I immediately sent this picture off to all my BMs and the consensus came back that they all loved it! Thankfully when I went back to order my dress The Bridal Gallery was able to give all my girls a discount so this dress came in under $150! Thankfully I was able to see a picture of the dress in Navy Blue, so I present to you the Barn Wedding Bridesmaid Dress:

Mori Lee Style 686 via Mori Lee 

I am so beyond excited about this dress. Once I saw it I knew this was the perfect dress for my ladies. I am also very thankful they all love it as well!

I can't wait to go pick it up and see how it looks! Did anyone else pull a random dress just to love it? Or did you let your girls pick?